


Description
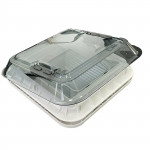
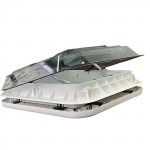
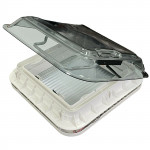
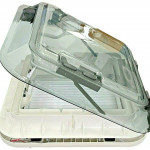
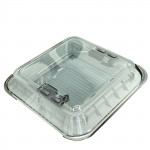
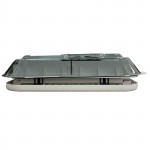
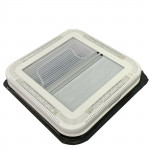
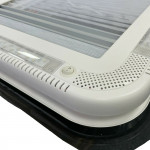
The Shield Autocare LED Skylight Dome Roof Vent is the perfect upgrade for any motorhome, campervan, horsebox, or small enclosed space requiring enhanced ventilation and natural light. Engineered from high-quality, impact-resistant, and UV-stabilized materials, this skylight is built to withstand the rigors of life on the road.
Lighting & Visibility
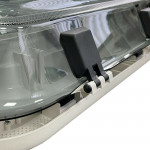
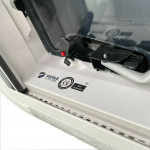
Our integrated LED lighting system (4.6W) provides excellent illumination when natural light isn’t enough, with a convenient switch for easy control. The double-glazed dome maximizes natural light entry while maintaining thermal efficiency.
Ventilation Excellence
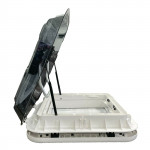
The intelligent design opens to a maximum angle of 60 degrees, delivering up to 150 cubic meters of continuous ventilation. Gas lift struts ensure smooth, effortless operation every time.
Complete Privacy & Protection
Each unit comes complete with blackout blinds for total privacy and light control, plus a flynet screen to keep insects out while allowing fresh air to circulate freely.
Versatile Applications: Ideal for a wide range of installations including:
- Campervans and motorhomes
- Horseboxes and livestock trailers
- Bathroom and sanitation areas
- Outbuildings, sheds, and barns
- Workshops and storage spaces
| Specification | Details |
|---|---|
| Product Code | SKY.450×400.LED |
| Overall Size | 587mm × 578mm |
| Cut-Out Size | 452mm × 402mm |
| Corner Radius | R15 |
| Above Roof Height | 98mm |
| Compatible Wall Thickness | 25-60mm |
| LED Power | 4.6W |
| Weight | 5.6kg |
Installation Guide
Before You Begin: If retrofitting to an existing vehicle, exercise extreme caution when cutting the aperture to avoid damaging the headlining. Ensure sufficient material remains to cover the timber frame.
Step-by-Step Instructions
1. Mark the Aperture
Place the internal cap (garnish) on the roof interior and trace around it with a felt-tip marker. Add 5mm to the top and left edges for clearance.
2. Cut the Opening
Drill pilot holes in each corner, then carefully cut along your marked line. Check for ribs, braces, and electrical wiring before cutting. Ensure the internal cap fits through the aperture, adjusting as needed. Smooth all edges and apply metal oxide primer to exposed surfaces.
3. Prepare the Frame
Construct a timber frame around the aperture matching your required internal finish depth (accounting for roof ply and lining thickness). The frame should accommodate wall thicknesses between 25-60mm.
4. Install Internal Frame
Apply Shield Stick and Seal (polyurethane adhesive) to the timber frame and clamp securely. Allow adhesive to fully cure. Once set, screw the internal cap to the timber frame. Seal around the lip from above using flexible putty or Sikaflex.
5. Prepare External Dome
Position the external vent over the internal cap lip and mark screw hole locations with a center punch. Remove the vent and drill 1/16″ pilot holes at all marked locations. Seal holes with primer paint.
⚠️ Important: If installing the LED version, prepare a 12V DC power source using 18-gauge wire before proceeding.
6. Seal and Position
Apply putty strips or Sikaflex bead around the roof opening, approximately 12.7mm (½”) from the edge. Use double layers over ribbed areas to ensure complete sealing coverage.
7. Secure the Vent
Insert the vent into the opening, pressing firmly onto the sealant. Use a screwdriver or nail to align the pilot holes with the vent frame holes.
⚠️ Critical: Position the vent with the lid hinge facing toward the front of the vehicle.
Install corner screws first to hold the vent in place, then install all remaining mounting screws. Tighten just enough to compress the putty tape—over-tightening may crack the plastic base.
8. Final Sealing
Apply appropriate roof coating to all screw heads and around the vent frame edge for weatherproof protection.
9. Installation Complete
Additional information
| Weight | 16 kg |
|---|---|
| Dimensions | 44 × 44 × 15 cm |
Related Products


Price range: £234.99 through £419.99

Price range: £209.99 through £399.99